

In just a couple of years, contouring and highlighting have become a must when it comes to makeup thanks to the likes of Kim Kardashian West and Huda Kattan. This makeup practice so versatile that it can help you to manipulate your facial features in the best way possible.
If you want higher cheekbones, a more sleek and chiseled face or even a more angular nose – with the help of a contour and highlighting kit, you can get that and more. Even if you don’t own a contour and highlighting palette, you can make use of a drugstore highlighter or a normal contour pen for enhancing your features whichever way you like.
Below, we will focus on the correct way to contour and highlight your face with makeup.
Understand Your Face Shape Before You Contour or Highlight
One of the biggest mistakes that we make when we are contouring or highlighting our face is when we do not draw the lines as per our face shape. Even though it may sound intimidating at first, once you understand the areas that need to be highlighted and concealed, it will become easier. Read on as we discuss the way to contour and highlight according to your face shape.
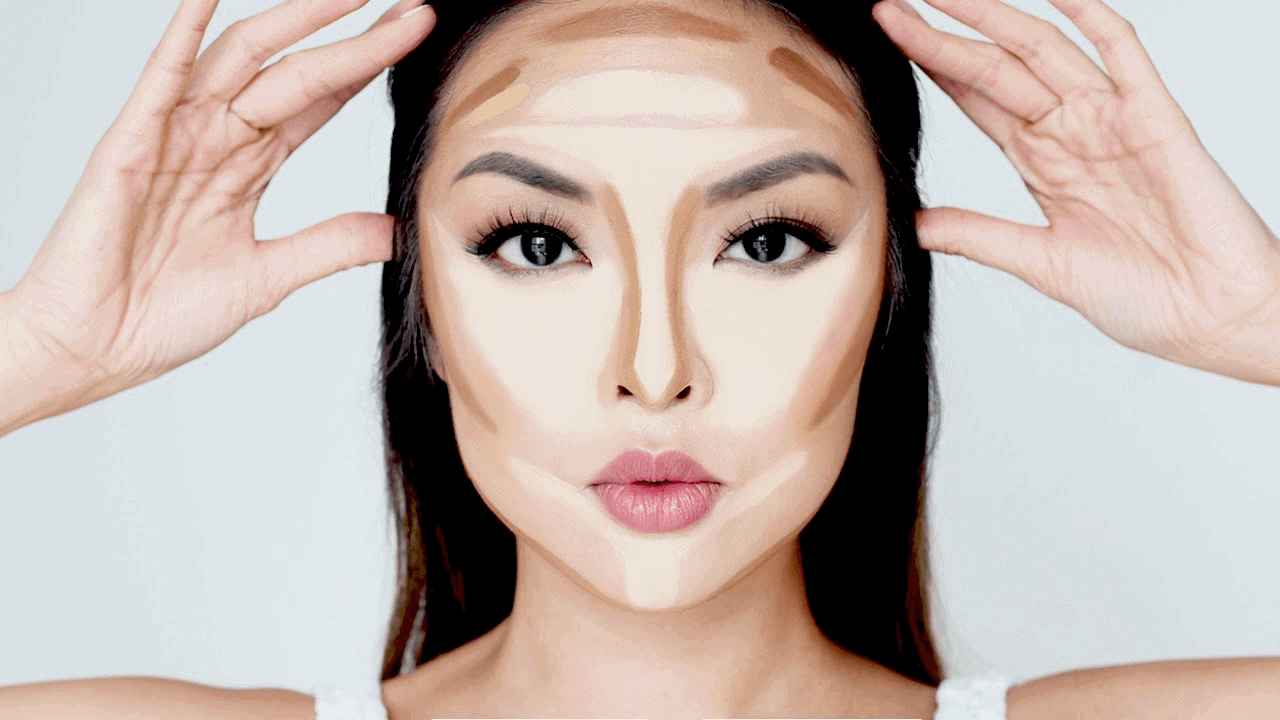
Round Face
When you have a circular face, the width and the length of your face are the same. In this case, you have to make your face look more angular.
You can do this by drawing the number ‘3’ from your upper forehead covering your cheekbones and then finally under your jawline. You have to avoid your chin to add more height to your face making it look more oval and defined.
Take a highlighter and draw lines along your chin and the center of your forehead. Always start using the highlighter from the center and then narrow it towards the hairline.
Square Face
The forehead, cheekbones, and jawline of people with a square face share the same width which makes contouring a little tricky. This is because the angles of your face look more prominent.
In the case of contouring, you need to focus on the corners of your face. Make a point to use the contour product in a manner that you create natural-looking shadows starting from below the temples towards the area underneath your cheekbones. The idea here is to soften the edges of your face.
You should highlight your cheekbones, your chin, and the very center of your forehead. Not only will this soften your face but it will also make your face look more oval.
Diamond Face
You have a diamond face shape when your cheekbones, which are on the wider side, start narrowing towards your forehead and jaw. With a narrow forehead and a pointy chin, your face can look quite angular, which is why you have to soften the severity.
Start contouring from the center of your forehead going to the side, sticking towards your hairline. And then, as you approach your chin, contour the bottom part to make it look shorter.
You have to enhance your temples and jawline sticking towards the sides as well. Use the highlighter in the middle part of your temple and cover your entire jawline blending it well.
Heart Shape
In case of a heart face shape, you have a pointy chin which is narrower when compared to the forehead. You need to contour and highlight in a manner that your defined chin looks more gentle.
Use the 'number 3' contour technique starting from your forehead to your cheekbones and to your chin. Yes, in case of a heart shape, you need to draw the contour on the bottom of your chin, making it look shorter and less sharp.
Since your skip contouring your jawline, you have to highlight it instead. Use a highlighter to bring out your jaw, which will take attention away from your chin.
Oval Shape
If you have an oval face shape, you don't really have to do much since everything is already well-balanced. However, if you still want to contour and highlight ok, you most certainly can. For contouring, draw lines from your temples to your cheekbones. Take care to stop just outside of your upper jaw.
Use lots of highlighter on the cheeks to make it look more prominent and sharper.
Other Tips to Keep In Mind When You Contour And Highlight
Here are a few extra tips to make sure you get this makeup trick to a tee.
- Be very careful with the shade of the contour and highlight that you use. You should never go more than two shades darker and lighter for your contouring and highlighting respectively. The other thing that you have to consider is the undertone. Contour shades that have cooler undertones or are more greyish blend really well into the skin.
- Don’t use too much product whenever you are contouring or highlighting. Instead of looking natural, you will end up looking cakey and aged. This is not the look you desire at all. Don’t forget to use a setting powder to increase the longevity of your makeup. Considering the amount of time that you invest in to perfect the contour and highlight, you should take the extra step of protecting it as well.
- Pay careful attention to the formula of the makeup that you use. If you have normal or oily skin, stick to a more cream-based product. However, if you have oily skin, use powder-based contour and highlight. In the case of liquid contour and highlight products, people with dry or normal skin can try it but, oily skin uses should refrain from using the formula.
- Blend, and then blend some more. The entire foundation of a good contour and highlight is blending. If you don't smoothen out the harsh lines, your face will end up looking very unnatural. You can use either a makeup brush or a Beauty Blender for a more even look.